Thread the coupling but to a certain extent and continue to tighten the bolts right until the tank almost hits the toilet bowl. To repair this type of leak you have to determine its source.

Buy 2 Pack Toilet Tank To Bowl Bolt Kits Heavy Duty Toilet Bolts For Toilet Tank Repair With Extra Long Nuts Double Gaskets For Fastening Easy To Install No Leaks Toilet Repair Screws Kit Online In
Stop your toilet tank from leaking without the help of a professional toilet repair service.

Repair Dripping Toilet Tank Tighten bolts How to repair leaking bathroom. Water draining from the tank. Pour a couple of liters of water down the tank before turning the water supply back on to check for any leaks. How to Replace Leaking Toilet Tank Bolts in 7 Steps.
Then fix the refill duct into the fill valve and arrange it on top of the surge pipe. Remove all metal washers in the tank -- metal washers inside the tank can cause leaking. Once the tank has been reattached you can turn the water supply back on and refill the tank.
Two EASY Ways to Drain the water out of your Toilet BOWL for cleaning. Remove all the necessary bolts washers and nuts from both the inside of the tank and below the bowl. Stop Toilet Drip FREE FIX Repair Dripping Toilet Tank Tighten bolts How to repair leaking bathroom - YouTube.
Tighten the nuts that you previously loosened that affix the tank to the supply tube and to the toilet bowl. Use towels to absorb the overflow. Place the tank back on the toilet and tighten the bolts.
How To Fix a Leaking Toilet - YouTube. Attach the current fill valve into the hole from where you pulled out the faulty one and tighten the screw that holds it in place. Place old towels on the.
Adhere to the manual procedures of how to fix a leaking toilet tank flapper as. Replace any faulty spacers bolts and washers between the tank and the bowl. Slip a bolt with a washer into each of the aligned holes.
The moment of truth. Reset the bolt by flipping the rubber washer on the inside of the tank. If you notice that its around the fittings the first thing to try is tightening the fitting.
Metal Washer Optional use only if there is a gap between the tank and the bowl Thin Metal Hex Nut Optional use only if there is a gap between the tank and the bowl Toilet Bowl. Now take a white rag or tissue paper and place it under the tank bolts. Recommended order of sealing and installing a tank to bowl toilet bolt.
Tightening your fittings can be a little tricky as too much pressure on the fitting can do more harm than good. The bolts will protrude on the bottom of the tank. Put in a rubber washer followed by a metal washer and a nut on each bolt and hand tighten until snug.
Once you have determined that the leak is in fact coming from the tank bolts you can go ahead and get a Toilet TankBowl kit. This repair involves completely removing the toilet tank. Empty the toilet completely by flushing it.
Remove the toilet lid. Stop the water flow going to the tank at the shutoff valve. To do so use your small pipe wrench place it around the fitting and slowly and gently tighten the nut.
Make sure the holes are aligned. Use the nut and washer under the tank to seal the tank first then prop up the tank on the sink. Put a metal washer followed by a rubber washer on each bolt and push them through the holes from the inside of the tank.
Install the new spud washer over the flush valve tailpiece and place the toilet tank back on the base. DO NOT use a metal washer directly under the bolt head inside the tank as. Before you do that it is a good idea to completely empty it.
Water dripping behind the toilet quickly creates a wet environment that encourages unhealthy mold growth. How to Fix Leaking Toilet Tank Bolts. If you confirm that the tank is leaking then go ahead and turn off the water supply valve under the toilet flush the toilet and sponge-dry the inside of the tank.
Step 1 Empty the Toilet Tank. Continue to hold the tank in the right position and put a washer on the bolt. Turn off the water supply valve and flush the toilet until the tank empties.
Reinstall the tank bolts gaskets and nuts alternately tightening the nuts from side to side so they tighten evenly. If the color changes you know the toilet tank is leaking. Now take the tank and gently place it onto the bowl.
How to use CLEAN a nasty Turdy Toilet bowl with VINEGAR. SHUT OFF THE TOILET SUPPLY VALVE FLUSH THE TOILET EMPTY THE TANK.

How To Replace A Tank To Toilet Gasket Homesteady Toilet Repair Leaky Toilet Toilet Tank

Toilet Seat Repair Keep Your Seat Tight Toilet Repair Toilet Seat Bathroom Repair
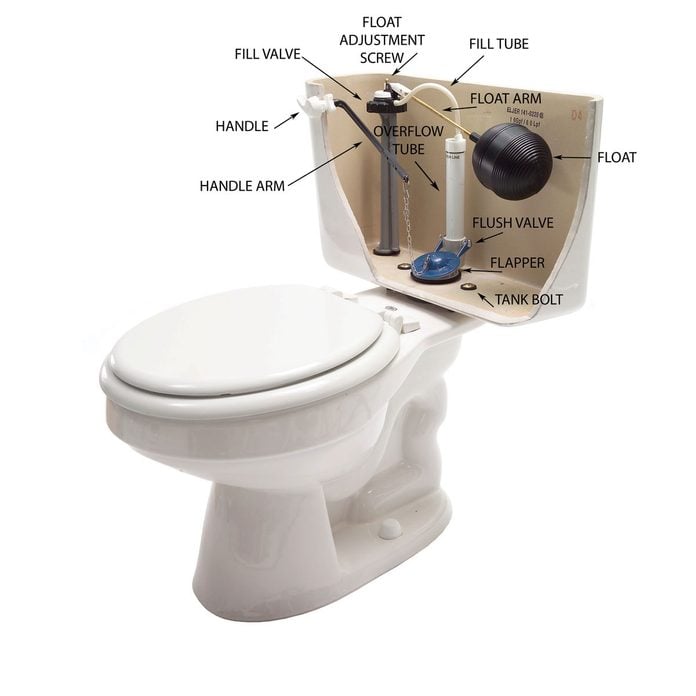
Toilet Tank Parts How A Toilet Works And Easy Fixes Diy Family Handyman

Fixing A Leaking Toilet The Last Thing A Homeowner Wants To Deal With But Life Happens So On This Post I Show You Leaking Toilet Toilet Repair Leaky Toilet

Toilet Seat Repair Keep Your Seat Tight Toilet Seat Toilet Repair Repair

70 Super Simple Totally Doable Teeny Tiny Ways To Be A Little Bit Greener Leaky Toilet Diy Life Hacks Toilet
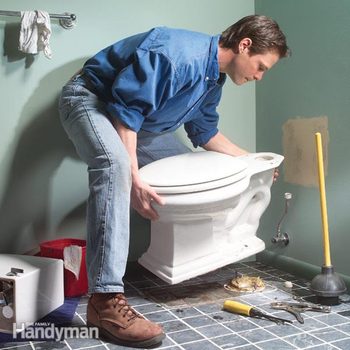
How To Repair A Leaking Toilet Diy Family Handyman

4 Ways To Fix A Leaky Toilet Tank Wikihow
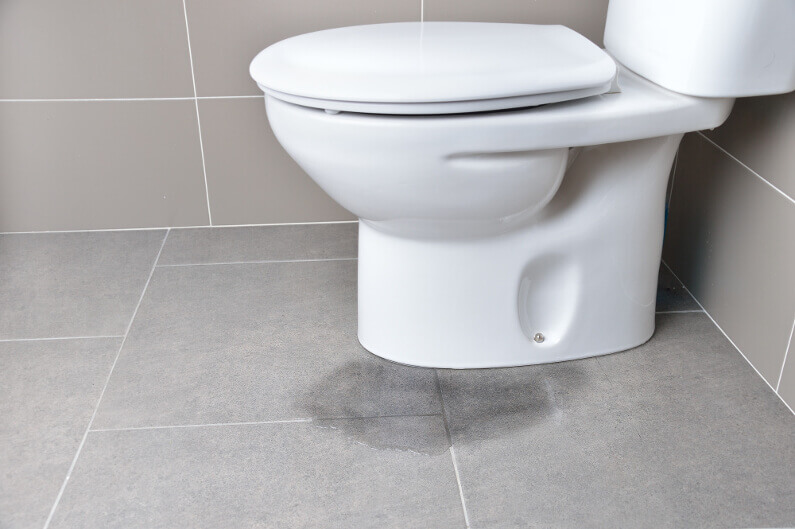
How To Fix A Leaking Toilet Base The Complete Guide

Fixing A Close Coupled Toilet Leaking Fresh Water Helpful Colin

Easy Fixes For Common Toilet Tank Parts Toilet Repair Bathroom Repair Diy Home Repair
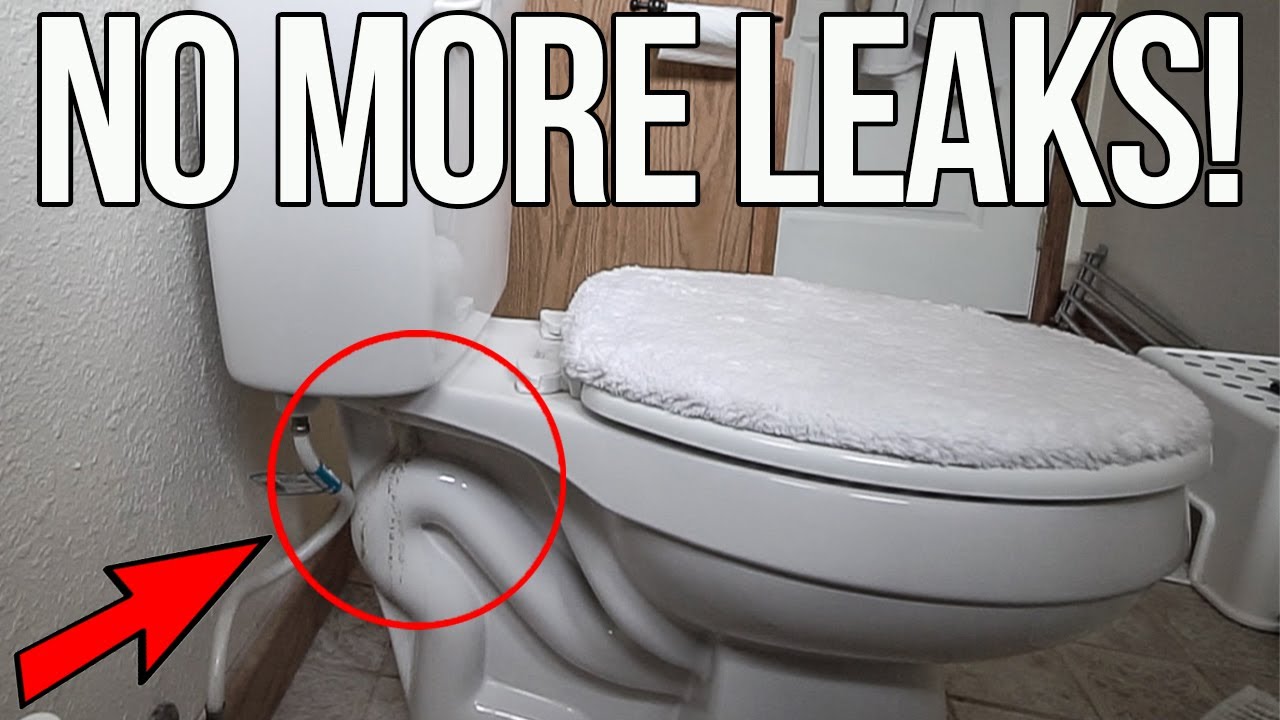
How To Fix A Leaking Toilet Tank With Rusted Tank Bolts Toilet Tank Repair Made Easy Youtube

Toilet Seat Repair Keep Your Seat Tight Diy Home Repair Plumbing Repair Toilet Seat

4 Ways To Fix A Leaky Toilet Tank Wikihow
/cdn.vox-cdn.com/uploads/chorus_asset/file/19505337/00_toilet_terms_x.jpg)
Toilet Leaking Identity The Problem With This Guide This Old House
Fix Your Leaky Toilet With Our How To And Troubleshooting Information

Tank To Bowl Gasket Toilet Tank Bolts Toilet Leaking From Tank Bolts Korky Toilet Repair

Pin On How To Fix A Toilet
How To Fix A Leaking Toilet This Old House


No comments:
Post a Comment